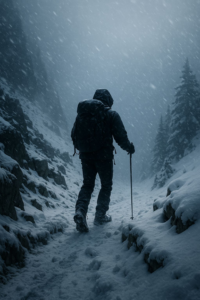
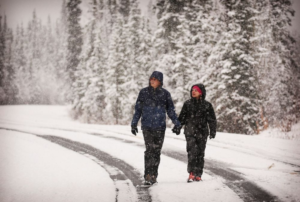
 Winter hiking offers a special kind of magic—snow-covered landscapes, crisp fresh air, and serene trails free from summer crowds. However, heading out for a hike in cold weather also brings unique challenges and safety concerns. The key to enjoying a winter trek is preparation and knowledge. By planning ahead, gearing up properly, and understanding the demands of the season, you can safely experience the beauty of winter wilderness on foot.
This guide provides essential tips for hiking in winter weather, helping you stay warm, dry, and safe while making the most of your cold-weather adventures. Whether you’re a seasoned trekker or a beginner eager to explore frosty trails, these winter hiking tips will keep you comfortable and confident on your journey.
Plan Ahead and Check the Weather
Always start with a solid plan. Winter conditions can be unpredictable, so it’s crucial to research and prepare before you set out. Begin by checking detailed weather forecasts for your hike location and the days of your trip. Pay attention to temperature highs and lows, wind chill factors, and the likelihood of snowstorms or heavy snowfall. If you’re hiking in mountainous terrain, look up avalanche advisories as well. Many national park and forest services provide trail-specific updates in winter, including snow depth and any recent avalanche activity or trail closures.
In addition to weather, plan your route carefully. Opt for trails that match your experience level under winter conditions—if you’re new to winter hiking, start with shorter, well-marked trails rather than remote backcountry routes. Note the total distance and expected time, then build in extra time because hiking through snow or on icy paths is slower and more strenuous than summer hiking. Always have a map of the area (physical map and/or downloaded offline map on your phone) and identify bail-out points or shortcuts in case you need to turn back early. Let a friend or family member know your plans, including which trail you’re taking and when you expect to return, as part of your safety plan.
Another planning aspect is daylight. Winter days are shorter, so plan to begin your hike early in the day. Determine a turnaround time—perhaps when half your available daylight is used—so you can get back before dark. Carry a headlamp or flashlight (with spare batteries) in case you’re still out at dusk; night falls quickly in winter, and you don’t want to navigate in the dark in freezing temperatures.
By thoroughly planning your winter hike with weather, route, and timing in mind, you greatly increase your chances of a safe and enjoyable outing. If the forecast looks dangerous (blizzard, extreme cold, high winds), it’s wise to reschedule or choose a safer, lower-elevation hike. There’s no shame in erring on the side of caution when it comes to winter weather.
Dress in Layers from Head to Toe
The clothing you wear on a cold-weather hike can make or break your experience. The golden rule for winter hiking gear is to dress in layers. Layering allows you to adjust your insulation as conditions change or as your body warms up during activity. If you start to sweat while climbing a hill, you can peel off a layer before moisture soaks your clothing (which would chill you when you stop). When the wind picks up or you take a break, you can put layers back on to stay warm.
Key layers and clothing tips include:
-
Base layer (inner layer): This is the layer next to your skin. Choose a moisture-wicking fabric like merino wool or synthetic
 (polyester or polypropylene) long underwear. A good base layer will keep sweat off your skin, which helps prevent you from getting chilled. Avoid cotton for any layer, but especially the base layer—cotton retains moisture and loses its insulating ability when wet, which can lead to rapid heat loss.
 -
Mid layer (insulating layer): The mid layer’s job is to retain body heat. Common mid-layer materials are fleece, down, or synthetic insulated jackets. For example, a fleece jacket or puffy down jacket can trap warmth effectively. You might wear two mid-layers (like a light fleece plus a down vest) if it’s extremely cold. Ensure this layer is warm but also breathable, so moisture can escape.
-
Outer layer (shell layer): The outer shell protects you from wind, snow, and rain. A waterproof and windproof jacket (ideally breathable, like one made with Gore-Tex or similar material) is essential. This layer keeps you dry from external moisture. Similarly, wear waterproof or water-resistant pants (shell pants) over an insulating layer on your legs if needed, especially in deep snow or wet conditions.
Don’t forget the extremities. Wear a warm hat (you lose a large percentage of body heat through your head) or a fleece beanie, and consider a balaclava or neck gaiter to protect your face and neck from windburn and frostbite. Insulated, waterproof gloves or mittens are a must—mittens tend to be warmer than gloves, but choose what gives you enough dexterity for tasks like handling zippers or trekking poles. It’s wise to pack an extra pair of dry gloves or glove liners in case one pair gets wet. For your feet, use wool or synthetic socks (again, not cotton), possibly with a liner sock underneath to reduce friction and wick moisture.
Footwear is critical: insulated, waterproof hiking boots with good traction are the foundation of winter hiking attire. Your boots should be roomy enough to accommodate thick socks without squeezing (tight boots can cut off circulation and make your feet colder). Gaiters can be very helpful in deep snow or muddy slush, as they wrap around the tops of your boots and lower legs to keep snow and moisture out.
Finally, polarized sunglasses or snow goggles are important on bright days or in snowy terrain. Winter sun can be blinding, especially with sunlight reflecting off snow, and UV exposure is still a concern at high elevations or on clear days. Protect your eyes to prevent snow blindness, and wear sunscreen on exposed skin (yes, you can get sunburned in winter!).
By layering thoughtfully and covering all parts of your body, you’ll create a personal microclimate that keeps you warm but also allows you to cool down when working hard. Proper winter attire lets you enjoy the hike rather than suffering from the cold.
Gear Up with Winter Essentials
In addition to clothing, gear selection for winter hiking is vital. Cold weather and snowy or icy terrain require a few extra tools and supplies beyond your standard hiking kit. Here’s a rundown of gear essentials for winter hiking:
-
Navigation and communication: Carry a map and compass, and know how to use them. Batteries in GPS devices or phones can die quickly in cold temperatures, so you can’t rely solely on electronics. If you do use your phone for navigation, keep it warm (in an inner pocket) and consider bringing a portable battery pack. As mentioned earlier, always let someone know your itinerary. In more remote areas, you might even carry a satellite communicator or personal locator beacon for emergencies.
-
Traction aids: Often, winter trails are snowy or have hidden ice. Equip yourself with traction devices like microspikes or crampons that can be strapped onto your hiking boots for grip on ice. Microspikes are lightweight and great for packed snow or moderate ice, while mountaineering crampons are for more extreme icy mountain conditions. If you expect deep, soft snow, consider bringing snowshoes. Snowshoes prevent you from sinking into deep snow (postholing) and make travel easier on unbroken trails or after a fresh snowfall. Choose snowshoes rated for your weight (including your backpack) and the snow conditions.
-
Trekking poles: Using trekking poles can greatly improve stability on slippery or uneven winter terrain. In snow, attach snow baskets to your poles (wide discs near the tip) to prevent them from sinking too deep. Poles help with balance on icy sections and can take strain off your knees during deep snow trekking. They also can probe the depth of snow or test if an icy surface is solid.
-
Lighting: As mentioned, always pack a headlamp even for a day hike in winter. Choose a headlamp with fresh batteries (lithium batteries perform better in cold than alkaline) and keep spares. The early darkness and possibility of delays make a light source essential. It also helps in shadowy forest sections during the day or in overcast weather.
-
Fire and shelter: In winter, having emergency shelter and the ability to start a fire can be life-saving if you get stranded or need to stay out overnight unexpectedly. Pack fire starters (waterproof matches, a lighter, and fire-starting aids like cotton balls soaked in petroleum jelly or commercial fire cubes). Also consider carrying an emergency bivvy sack or space blanket. These are lightweight and can help retain body heat if you have to stop for a long period or spend an unplanned night outdoors.
-
First aid and repair kit: Always carry a basic first aid kit, with added items for winter like chemical hand warmers (which can double as a way to treat mild hypothermia or keep camera batteries warm). Also carry a small repair kit (duct tape, a multi-tool or knife) in case your gear breaks — for example, a snowshoe strap or a backpack buckle. In cold conditions, even a simple thing like a broken boot lace can become a big problem, so being able to improvise fixes is important.
-
Extra clothing and gear: Bring at least one extra warm layer beyond what you think you’ll need, in case of an emergency or if you have to stop moving for a long time. An ultralight down jacket or fleece can pack small and provide a big warmth boost when you take a rest. Also pack extra socks and maybe an extra hat or gloves. They weigh little but could be a godsend if your originals get wet or someone in your group needs a spare.
-
The Ten Essentials: Winter or summer, the classic Ten Essentials list (navigation, headlamp, sun protection, first aid, knife, fire, shelter, extra food, extra water, extra clothes) should be in your backpack. In winter, these items are even more critical. Make sure you have every category covered before you set out.
If you’re unsure how to pack effectively for a winter outing, it can help to review a basic gear checklist. (For a comprehensive packing list for outdoor adventures, see What to Bring on Your First Camping Trip: A Beginner’s Guide.) Many principles of a good packing list for camping or three-season hiking apply to winter hiking as well—you just carry more warmth and weather protection.
Lastly, remember that winter gear is there to keep you safe, so use it when needed. If conditions turn icy, stop and put on your microspikes rather than risking a fall. If the wind kicks up, throw on your shell and gloves before you get too cold. Proactive gear use will keep small issues from turning into emergencies.
Stay Hydrated and Fueled
It’s easy to overlook hydration when the weather is cold—unlike in summer, you might not feel as thirsty. However, staying hydrated is just as important during winter hikes to keep your energy up and to help regulate your body temperature. You actually breathe out a lot of moisture in cold, dry air and still sweat under those layers, so you can become dehydrated in winter without realizing it.
Drink water regularly throughout your hike. Aim to sip periodically rather than wait until you’re very thirsty (thirst can be a lagging indicator of dehydration). One challenge is keeping your water from freezing. Use insulated water bottle covers or sleeves, and store bottles upside down in your pack; water freezes from the top down, so if the bottle is upside down, the ice forms at the bottom (now the top of the bottle when you flip it to drink) first, leaving the drinking end free of ice for longer. You can also carry warm drinks in a thermos—hot tea, cocoa, or even warm broth can provide both hydration and core warmth on a frigid day. Just avoid too much caffeine or any alcohol, which can contribute to dehydration and make you feel colder by speeding up heat loss.
Eat enough calories before and during your winter hike. Your body burns more energy in cold weather, both to hike through challenging terrain and to stay warm. Pack plenty of snacks that are easy to eat on the go. Good options include trail mix, energy bars, chocolate, nuts, dried fruits, and jerky. These high-energy foods won’t freeze solid (or if they do, they can be thawed in an inner pocket). It’s also wise to bring something for lunch on longer hikes, like hearty sandwiches or wraps that won’t spoil in the cold (the cold actually helps keep perishable foods fresh).
Take breaks to eat and drink, but not for too long or you’ll start to chill. A tip for rest stops: put on an extra jacket when you stop moving so you don’t get cold quickly while sitting. Then take it off when you resume hiking to avoid overheating once you’re moving again. This way, you maintain a balance between staying warm and not sweating too much.
By keeping yourself fueled and hydrated, you’ll have the energy needed to stay warm (your body is like a furnace that needs fuel) and to remain alert. Fatigue from lack of food or water can make you more prone to mistakes, so treat snack and water breaks as essential parts of your winter hiking routine.
Understand Winter Trail Conditions and Hazards
 Winter transforms the trail environment, and hikers must stay alert to unique hazards. Snow and ice are the obvious ones: trails may be covered, obscuring the path and even trail signage or blazes. Pay close attention to navigation, and do not assume you can simply follow others’ footprints — those tracks might lead off trail or be erased by new snow at any time. Use a map and compass to confirm you’re on course, especially if the landscape is a uniform white. In white-out conditions or heavy falling snow, it might be safest to turn around to avoid getting lost.
Be wary of icy surfaces. What looks like solid snow could have a sheet of ice underneath or be hard-packed and extremely slippery. This is where your traction aids (microspikes or crampons) are critical. If you come across frozen streams or lake edges along the trail, do not trust the ice unless you’re absolutely sure it’s thick enough to support your weight — falling through ice into water is life-threatening. It’s usually best to go around frozen water bodies rather than across them, unless it’s a known, frequently traveled crossing with very cold temps ensuring thick ice.
In mountain regions, avalanche risk is a serious concern in winter. If your route crosses open slopes steeper than around 25–30 degrees or runs beneath such slopes, you need to be aware of avalanche conditions. Check local avalanche forecasts (often provided by ranger stations or avalanche centers) on the day of your hike. Unless you have avalanche training and safety gear (beacon, probe, shovel) — and even if you do, when risk is considerable — it’s wise to stick to low-angle or forested trails where avalanches are unlikely. Signs of potential avalanche danger include recent heavy snowfall, “whumpf” sounds or cracking in the snowpack, and evidence of slide activity on similar slopes. If in doubt, avoid those areas.
Another hazard is the cold itself. Frostbite and hypothermia are constant threats. Learn to recognize early signs: tingling or numbness in extremities (fingers, toes, nose, ears) can signal frostnip (the precursor to frostbite) — time to stop and warm up those parts immediately. Shivering, loss of coordination, fumbling hands, slurred speech, or unusual confusion can indicate hypothermia, which is dangerous. Prevent these by dressing properly (as covered earlier), staying as dry as possible, and adding layers or seeking shelter when you start feeling too cold. If you or your hiking partner show signs of hypothermia, act quickly: add insulation, replace any wet clothing with dry backups from your pack, give warm drinks if possible, and move to a lower elevation or sheltered area. In severe cases, the affected person needs to get indoors and warm as soon as possible — this may mean ending the hike early or calling for help. Don’t ignore the warning signs; they only get worse if you push on without intervention.
Winter wildlife can also present considerations. You might encounter animals like deer or elk, or see the tracks of foxes, rabbits, and other creatures in the snow. Always keep a respectful distance from any wildlife. Animals in winter are often stressed for food and cold, so disturbing them can be harmful. On the other hand, be aware that predators or large animals might be out and about at different times (for example, some bears might not fully hibernate in areas where winters are milder). Carrying bear spray in certain regions could still be wise, and know how to use it even with gloves on. Secure your food well in your pack so the scent doesn’t attract unwanted visitors at a rest stop.
Finally, adjust your expectations for winter trail travel. You will move slower than you would on dry, snow-free ground. A hike that takes 4 hours in summer might take 6 or 8 hours in winter conditions. Deep snow, trail-breaking, or detours around hazards all add time. That’s normal. Be patient with the pace and build in those time buffers when planning. Winter hiking is more about the journey and staying safe than bagging a peak in record time. Savor the unique experience and don’t worry about speed.
Don’t Go Alone if Possible
Hiking with a partner or a group is highly recommended in winter. The buddy system means there’s someone to help if an issue arises, and you can motivate each other to keep spirits up in harsh conditions. If one person is injured or starts showing signs of hypothermia, the other can administer first aid or seek help. Teamwork is invaluable when dealing with winter surprises.
If you must hike solo, take extra precautions. Choose well-traveled trails, stick to your turnaround times strictly, and consider investing in a satellite messenger (like a Garmin inReach or SPOT device) that can send SOS signals where cell phones have no reception. Solo hikers should be extremely confident in their winter skills and navigation.
Whether alone or in a group, always inform someone who’s not on the hike about your plan (as mentioned earlier). Share details such as which trail you’ll be on, your planned start and finish times, who is in your group, and when you’ll check in afterward. For example, you might tell a friend that two people are in your hiking party, you plan to start on Trail X at 8 AM and be done by 3 PM, and that you will text or call to confirm your safe return by 4 PM. This way, if they don’t hear from you by a set time, they can alert rescue authorities with your last known location. It’s a simple step that can save your life in an emergency.
While on the trail with a partner or group, practice good communication. Make sure everyone is feeling okay and speak up if you need to pause to add a layer, eat a snack, or address an issue like cold feet. It’s better to deal with small problems early before they become big problems. Keep the group together — put the slowest hiker in front, so nobody gets left behind inadvertently. In winter conditions, losing sight of a group member can be dangerous, as heavy snow or low light can reduce visibility, and a separated person could take a wrong turn or have an accident without others noticing immediately.
Remember that “safety in numbers” truly applies in winter. Even experienced hikers often prefer going out with at least one partner in cold conditions. It adds a layer of safety and also makes the adventure more enjoyable when you can share the experience of a beautiful snowy vista or help each other over that tricky icy patch.
Be Flexible and Know When to Turn Back
Perhaps one of the most important tips for winter hiking (and hiking in general) is to listen to your instincts and know your limits. Winter mountains will always be there another day — there’s no shame in turning back early or changing plans if conditions deteriorate or if you’re not feeling up to the challenge.
Pay attention to the changing environment and your own body. If a planned route becomes too difficult or risky (for example, you encounter avalanche-prone terrain or ice beyond what your equipment can handle), turn around. If the weather suddenly shifts — say, an unexpected snowstorm blows in or winds become dangerously strong — it may be prudent to cut the hike short and head back to safety. Always have a Plan B: this could be a shorter hike nearby, or simply heading home and coming back when conditions are better.
Likewise, monitor your personal condition. Are you shivering continuously and not warming up even when you put on extra layers or move faster? Are your feet numb or is fatigue making every step a struggle? These can be signs it’s time to call it a day. Hypothermia, frostbite, and exhaustion can sneak up on even the experienced. It’s far better to stop or turn around before you reach a critical point. Swallowing your pride and making the safe choice means you’ll get another chance to adventure in the future.
In winter hiking, being conservative is usually the smart move. That might mean turning around 100 yards from the summit because the final stretch is icy and unsafe, or skipping the last viewpoint of a loop trail because daylight is running out. Make peace with those tough calls; they’re part of the discipline of safe backcountry travel. In fact, seasoned winter hikers often have stories of “the trip that wasn’t” — an attempt where they had to abort mission due to safety concerns. Those stories are always better than tales of someone needing rescue (or worse) because they pushed on irresponsibly.
A good practice is to set a predetermined turnaround time when planning your hike (for example, “If we haven’t reached the lake by 2:00 PM, we’ll head back”). Stick to it, even if you’re tempted to press onward. Summits and scenic vistas will be there next time, but only if you stay safe now.
Keep the Adventure Going (Off-Season Fitness and Fun)
Winter hiking is fantastic, but it’s not the only way to enjoy the outdoors in the colder months. If deep snow or extreme weather keeps you off your favorite footpaths, consider some alternative activities to stay active and keep your adventurous spirit alive. Embracing a mix of winter sports can also build skills and fitness that complement hiking when fair weather returns.
For instance, snowshoeing is a natural extension of hiking in winter — essentially hiking on top of the snow with specialized footwear. If you love hiking, snowshoeing can get you to beautiful snowy backcountry spots without sinking in waist-deep. Cross-country skiing is another great way to cover ground on snowy trails and is a terrific cardio workout. Even downhill skiing or snowboarding can improve your balance and leg strength for when hiking season comes back around.
If you prefer wheels to skis, you might try some off-road riding on winter-friendly routes. Fat-tire biking (bicycles with extra-wide tires) is popular on packed snow trails. And for a motorized thrill, consider hitting some off-road areas on a dirt bike or ATV where it’s permitted. Many off-highway vehicle (OHV) trails in milder climates remain open year-round. Riding a dirt bike can be an exciting cross-training activity that hones your reflexes and gives you an adrenaline rush. Check out Wild Child Sports’ Top 10 Best Dirt Bike Trails in the US: Get Ready to Ride for inspiration on great places to rev up and ride. If you’re new to dirt biking, you might also explore beginner-friendly options like electric mini bikes; for example, see the Razor Electric Dirt Bikes: The Ultimate Buyer’s Guide which breaks down various models perfect for entry-level riders. Trying a fun activity like this can spice up the off-season while still getting you outside and exploring.
Finally, use the winter season to prepare for future hikes. This is a great time to review your gear, perhaps upgrade your first aid kit, or practice navigation skills. You could even plan spring or summer trips—research new hiking destinations, maybe ones you noted while reading about those dirt bike trails or national parks. Winter offers a chance to slow down and appreciate different activities, but it also builds the anticipation for the adventures to come in warmer months.
If you’re looking for other great places to hike in the United States, check out Which States Have the Most National Parks to plan your next great outdoor adventure!
Enjoy the Beauty of Winter Hiking
Hiking in winter weather, when done thoughtfully, can reward you with some of the most serene and stunning outdoor experiences. Snow-laden trees, sparkling icicles on rocky ledges, and the profound quiet of a winter forest are all sights and sounds that you just can’t get on a busy summer day. With the right preparation—proper gear, clothing, planning, and mindset—you can safely explore these winter wonders.
Keep in mind that every winter hike, big or small, is a learning experience. You’ll get better at judging how many layers to wear, how to adjust your pace, and what gear is truly essential as you gain more cold-weather hiking mileage. Always respect the power of nature; winter demands that respect more than any other season. When you do, it will reward you with memories of crunching snow underfoot, crystal-clear winter skies, and the satisfaction of overcoming a unique challenge.
So bundle up, plan smart, and step out into that frosty air. With preparation and a spirit of adventure, you can enjoy the beauty of winter hiking while staying safe and warm. Happy trails! If you’re planning on camping as well, check out The Most Common Mistake First-Time Campers Make (and How to Avoid Them).