Wouldn’t you know it? Your kids are out having a blast and the battery died on the Dirt Rocket. Now you have to replace the battery on a Razor MX350 Dirt Rocket. Turns out this is a pretty easy fix. There are 4 easy steps that only take about take about 15 minutes. Don’t forget to turn off the power before you start.
Here’s a list of tools and supplies you’ll need before you get started
- Replacement battery for a Razor MX350 Dirt Rocket – Find it on Amazon
- 4mm and 5mm Allen wrenches
- Philips head screwdriver
- Needle nose pliers
Ok. Now you’re ready. Let’s get this done.
Step 1. Remove the Fairings
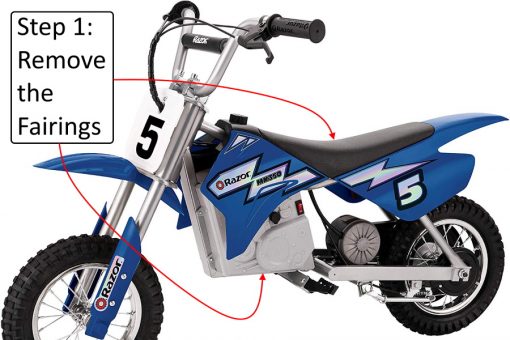
If you are new to this, the fairings are just basically the plastic covering that covers all of the inside parts of your Razor MX350 dirt bike. The first screw is under the gas cap. You’ll need to use 5mm Allen wrench to remove it.
Next, there are 2 screws in the rear under the tail. They take the same 5mm wrench. After the 3 screws are removed the whole plastic fairing slides back about an inch and then you can lift is straight up. Once removed you can set it aside.
There are 6 Phillips head screws that need to be removed. They are located around the outer edge of the battery cover. Once the screws are removed you can slide the face straight out and set it off to the side. The backside of the battery cover has some of the wiring connected to you need to be cautious when removing it. The power cables are connected to both the charging port and the power switch. You can disconnect the charging by simply squeezing the connector and pulling the plug apart.
For the power switch, you’ll need the needle-nose pliers. There are two wires to the power switch. Use the pliers to grab the backside of the wire and then pull straight out. Make sure you are grabbing the part of the connector that is fastened to the wire and not just the wire so you don’t cause a disconnection in the plug.
Once both the switch and the charging wires have been disconnected you can remove and set aside the back portion of the cover.
Step 2. Remove the Battery
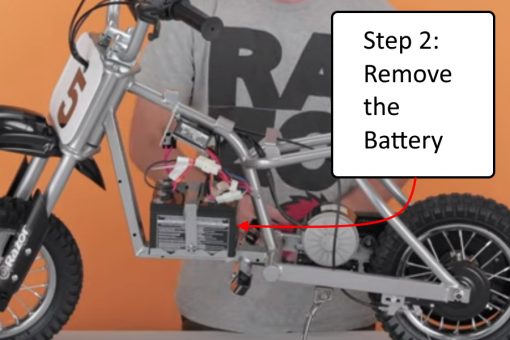
You’ll need the Allen wrench for this part. The battery is secured with a tie-down strap that holds the battery in place on the frame. There is one screw located on each side of the battery tray. Once you remove the screws you can lift the metal strap up and slide it out.
The batteries are attached via a connector. Simply follow the wires from the battery to the connector to make sure you are disconnecting the right parts. Once identified, you just need to pinch the sides and pull apart the connector.
At this point, the batteries should be totally disconnected so you can simply lift them straight up over the edge of the tray and pull them out.
Step 3. Install a new Battery
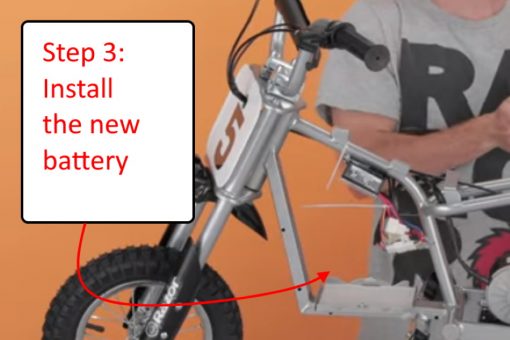
Take the new batteries, slide them over the battery tray and place them in the tray keeping the cables on the same side the original batteries had the cables. Next, take the metal tie-down strap, slide it over the batteries into its prior position and use the Allen wrench to fasten the screws. The last part of this step is to reconnect the power cables with the connector. Make sure to connect it completely pushing it in until you hear it snap together.
Step 4. Reinstall the Fairings
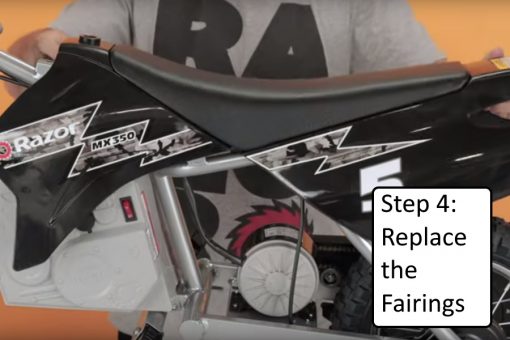
You’ve made it to the last step. Start with the backside of the battery cover. You’ll need to reconnect the power switch and the charging port. Both of the cables that connect to the power switch are positive so you can connect them in any order. Next, take the connector for the charging port and plug it into the open port on the harness.
Once all of the plugs have been reconnected just slide it over the battery and line up the holes with the holes in the frame of the dirt bike. Next, take the other side of the cover and slide it straight on lining it up with the holes on the other side of the bike. With both sides of the plastic casing on and lined up you are ready to put the screws back on.
You’ll need the Phillips head screwdriver again for this. You should still have the 6 screws you removed. There are 4 long screws that go along the bottom and side while the 2 short screws are used for the top.
After the battery cover is on you are ready to reinstall the top fairings. To do this you set it on the frame a couple of inches back and then slide it forward into place. Next, get the 5 mm Allen wrench and the 3 screws. Replace the screws in the backside under the seat and then the one that is in the gas cap location. With all 3 screws on you can put the gas cap back on.
Now you’re all set. Flip the power switch to make sure everything is working properly and head out for some fun.
Replace the Battery on a Razor MX350 Dirt Rocket Video Instructions
Here’s the video Razor put out to help you replace the battery on a Razor MX350 Dirt Rockey quickly.
- Razor MX400 Dirt Rocket Electric Dirt Bike
- Razor MX500 Electric Dirt Bike
- Razor MX650 Electric Dirt Bike
Also, if you are looking for the differences between the Razor Dirt Bikes check out these comparison posts:
- Razor MX350 VS MX400 Comparison Review
- Razor MX350 VS MX500 Comparison Review
- Razor MX350 VS MX650 Comparison Review
And if you want to see how the Razor MX350 stacks up against the competition in the kids electric dirt bike market check out this one.